Need any help or advice?+44 (0)1782 454499

VIDEO TUTORIAL

USED IN THIS PROJECT

Although not necessarily an exhaustive list, the following tools and materials, supplied by Easy Composites, were used in this project.

The quantity shown below is the approximate amount used in the project rounded up to the nearest available kit size or quantity.

INFUSION EQUIPMENT & CONSUMABLES
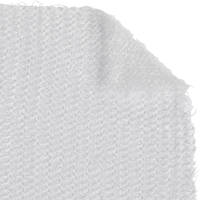
FM100 Infusion Mesh (1050mm) 5m Folded Pack Thumbnail
AFFM100-105-5PKFM100 Infusion Mesh (1050mm) 5m Folded Pack£12.00 /pack

6mm ID Budget PVC Vacuum Hose 5m Thumbnail
VH-PVC6-56mm ID Budget PVC Vacuum Hose 5m£5.95 /pack

FM170 EasyFlow Knitted Infusion Mesh (1250mm) 5m Folded Pack Thumbnail
AFFM170-125-5PKFM170 EasyFlow Knitted Infusion Mesh (1250mm) 5m Folded Pack£14.70 /pack

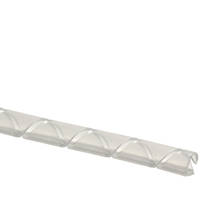
Resin Infusion Spiral Standard Flow 10m Coil Thumbnail
RISP-M-10Resin Infusion Spiral Standard Flow 10m Coil£3.50 /pack

Total £0.00
VACUUM BAGGING CONSUMABLES
VB160 Vacuum Bagging Film LFT (1520mm) 5m Folded Pack Thumbnail
AFVB160-152LFT-5PKVB160 Vacuum Bagging Film LFT (1520mm) 5m Folded Pack£12.40 /pack

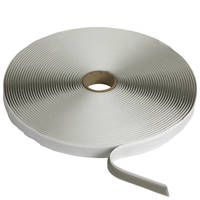
ST150 Vacuum Bagging Sealant Tape 15m Each Thumbnail
VBST150ST150 Vacuum Bagging Sealant Tape 15m Each£5.50 /roll

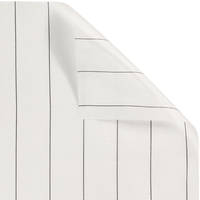
PP180 Economy Peel Ply Black Tracer (1520mm) 5m Folded Pack Thumbnail
AFPP180-152-5PKPP180 Economy Peel Ply Black Tracer (1520mm) 5m Folded Pack£10.00 /pack

Total £0.00
REINFORCEMENTS
210g 2x2 Twill 3k Carbon Fibre Cloth (1000mm) Thumbnail
CF-22-210-100210g 2x2 Twill 3k Carbon Fibre Cloth (1000mm)£23.00 /linear metre

Total £0.00
MATERIALS & CONSUMABLES
CR1 Easy-Lease Chemical Release Agent 500ml Thumbnail
CR1-05CR1 Easy-Lease Chemical Release Agent 500ml£16.50 /pack

Nitrile Gloves - Box of 100 Large Thumbnail
NG-100-LNitrile Gloves - Box of 100 Large£8.95 /pack

Total £0.00
STARTER KIT(S)
Resin Infusion Starter Kit Thumbnail
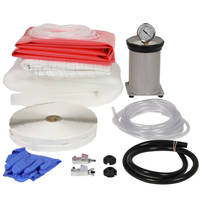
SK-RIResin Infusion Starter Kit£145.00 /kit

Total £0.00
TOOLS & EQUIPMENT
10kg High Capacity Digital Scales Thumbnail
SCALE10KG10kg High Capacity Digital Scales£11.63 /each

Resin Infusion Silicone Connector Thumbnail
RI-SCVResin Infusion Silicone Connector£3.25 /each

Professional 10 Inch Carbon Fibre Composites Shears Thumbnail
SC-CK10Professional 10 Inch Carbon Fibre Composites Shears£57.90 /each

CP1 Resin Infusion Catch-Pot 1.2L Thumbnail
RICP-P-SCP1 Resin Infusion Catch-Pot 1.2L£79.95 /each

EC4 Compact Composites Vacuum Pump + UK Lead Thumbnail
VP-EC4-UKEC4 Compact Composites Vacuum Pump + UK Lead£269.50 /each

Resin Infusion Line Clamp Thumbnail
RI-LCResin Infusion Line Clamp£5.25 /each

Total £0.00
RESIN AND EFFECTS
IN2 Epoxy Infusion Resin SLOW 5kg Kit Thumbnail
EP-IN2-S-5IN2 Epoxy Infusion Resin SLOW 5kg Kit£79.75 /kit

Total £0.00

VIDEO TUTORIAL

Perfect Resin Infusion for Cosmetic Carbon Fibre Parts

Detailed video tutorial demonstrating the perfect technique for epoxy resin infusion to produce a professional quality carbon fibre part.

In the how to do resin infusion tutorial we explain how to position elements of the resin infusion system including resin feed spiral and infusion connectors, along with explaining what the different consumables used for resin infusion are and where they should be positioned.

The end result is a carbon fibre part with a flawless surface finish, without the need for a gelcoat or clearcoat, with similar fibre ratio and mechanical performance to prepreg (dry) carbon fibre.


TUTORIAL BREAKDOWN

Preparing the mould

1. Preparing the mould

The first stage is to prepare the mould by applying the release agent to the mould surface. In this case we are using a modern chemical release agent, Easy-Lease, due to its superior release properties, ease of use and semi-permanent nature.

On a new mould, you will need 6 layers of Easy-Lease applied with a 15 minute wait between coats and 1 hour wait after the final coat before use of the mould.

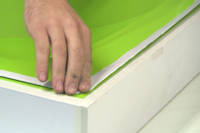
At this stage we are also going to be applying Vacuum Bagging Gum Sealant Tape around the flange of the mould. This tape is used to form a seal between the mould flange and the Vacuum bagging film. Be careful to ensure there is no dirt or strands of fibre or hair trapped under the gum tape as even a tiny hair can be enough to cause a small leak in the bag.

Laying up the fabric

2. Laying up the fabric

The fabric being used in this tutorial is 3 layers of our top quality Carbon Fibre 2/2 Twill 3k 210g giving an overall part thickness of approximately 0.75mm.

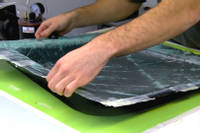
Carefully lay the first layer of fabric into the mould taking care not to distort or pull the fibres. Gently press it into all the corners of the mould, then carefully trim the edge of the fabric making sure the fabric finishes inside of the gum tape on the flange. Then using some masking tape, tape down the edges to help hold it in place. Repeat with the second and third layers of fabric.

Positioning the vacuum bagging consumables

3. Positioning the vacuum bagging consumables

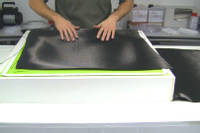
The bagging stack for Resin Infusion is specific to the job with each layer having its own purpose. The first layer to go onto the fabric is the PP180 Peel Ply which is designed to aid removal of the rest of the bagging stack once the infusion is complete and cured. The peel ply is simply laid into the mould then cut to size and taped into place. Take care to ensure there is enough material in the mould so that it does not bridge during the later vacuum bagging.

Then add the FM100 Infusion Mesh in a similar way to the peel ply. Due to the springy nature, it can help to cut it in the corners to help it conform to the mould shape.

The Resin Spiral is then cut and taped down to the resin feed side of the mould. It's purpose is to transport the resin from the resin feed evenly along the length of the mesh. Straighten out the spiral and hold it in place using masking tape. Then place the Resin Infusion Silicone Connector centrally onto the resin spiral.

The final step before finishing with bagging material, is to set up the vacuum port. Cut two thin strips of Infusion Mesh and place them on top of each other at the opposite end of the mould to the resin feed. This is to help form a path for air and resin to flow to the vacuum outlet. Then place the another Resin infusion silicone connector in the middle of the mesh strips.

Making the vacuum bag

4. Making the vacuum bag

Prepare the VB160 Vacuum Bagging Film by cutting a piece significantly over size for the size of the mould. This is to ensure you have enough bagging material to fit in the mould. The excess length is taken up with pleats in the bag.

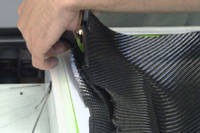
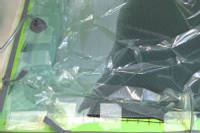
Starting in one corner of the mould, removing the gum tape backing as you go, apply the film evenly and smoothly to the tape ensuring there are no creases in the film and no fibres or materials are trapped under the tape. Depending on the size of the mould and piece of film, you will need to make pleats to take up the excess bagging material as you go along the gum tape edge. Try to evenly space these around the mould. To do this, cut a small length of gum tape and apply one end to the gum tape on the flange. Run the film up the loose piece of gum tape, then removing the backing, fold over the top slightly to seal it, and run the film back down the reverse of the tape until you are back on the flange.

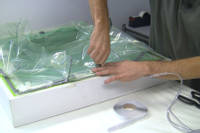
Continue around the mould edge until the bag is fully sealed onto the flange. The last step is to connect up the resin and vacuum ports. To do this, cut the required lengths of 6mm ID PVC Vacuum Hose, then wrap a length of gum tape around the end of the hose, leaving around 10mm exposed. Then, very carefully, snip a small hole in the bag above the Resin Infusion silicone. Push the hose end through the hole and into the hole in the silicone connector. Pull the film tight around the connector and press the hose and gum tape into place. Press the gum tape down onto the film to seal the hose to the film. Repeat for the vacuum port resin infusion connector.

Pulling a vacuum and leak testing

5. Pulling a vacuum and leak testing

First off, use a Resin Infusion Line Clamp to close off the resin feed.

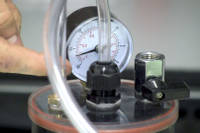
Set up your Compact Composites Vacuum Pump and Resin Infusion Catch-Pot then connect the vacuum feed line to the catch pot inlet and connect the catch pot to the vacuum pump hose tail barb. You are now ready to pull down the bag.

Switch on the pump and open the valve on the pump to evacuate the air from the vacuum bag. As you do so, move the bagging material around to ensure it gets into all the corners and recesses of the mould to avoid any bridging of the bagging material. It can help to shut the valve occasionally to give you time to do this while the bag is still at partial vacuum and the material can be easily moved around.

As the bag almost reaches full vacuum, now is the time to find and fix any leaks. The gauge on the catch pot may not yet be at full vacuum, indicating you have a leak, or you may even be able to hear a leak. Work around the gum tape pressing down firmly as you go to ensure the gum tape is fully sealed. Also check the vacuum and resin ports in the same way. Keep working around until all leaks have been found and sealed. Once full vacuum has been achieved, you are now ready to conduct a leak test.

Clamp off the vacuum line between the mould and the catch pot, then shut the valve on the pump and switch it off. Leave the bag for 15 minutes to conduct the leak test. This is to ensure there are not any further tiny leaks in the bag. After 15 minutes, open the line clamp between the bag and catch pot, carefully looking for any change in the needle on the gauge which would indicate a leak. If there is a leak, you need to find it and seal it before repeating the leak test. Once happy you have a sealed bag, you can move on to the infusion itself.

Infusing the resin

6. Infusing the resin

Using the table in the Resin Infusion Starter Kit Instructions, calculate how much resin you will need to use for your infusion, based on number of layers of fabric and surface area of the mould. Using good quality digital scales, weigh out our specialist IN2 Epoxy Infusion Resin taking care to exactly follow the mixing ratio on the bottles. Using a suitable mixing stick, thoroughly mix the resin, taking care reach the sides and bottom of the mixing pot. Once mixed, you can allow the resin to stand for a few minutes to allow some of the bubbles to naturally degas.

Put the resin feed hose into the resin jug and, using a spare resin infusion line clamp, clamp it gently to the side of the jug so it does not move. Switch on the pump and open the pump valve. Gently open the resin feed line clamp to allow the resin to enter the mould.

The resin will flow into the fabric and across the mould. Keep allowing the resin to flow until resin reaches the Resin Infusion Catch pot, then clamp off the resin feed line. Wait around 10 seconds then clamp off the vacuum line between the mould and the catch pot. You can now shut the vacuum pump valve and turn off the pump.

Remove vacuum bagging materials and demould the part

7. Remove vacuum bagging materials and demould the part

First of all, undo the line clamps and pull the hoses out of the bag. Then, starting at one edge, pull the gum tape and vacuum bag off the part. The Vacuum bagging film will not stick to the resin so should come off relatively easily. Remove the silicone connectors for later re-use.

Now you are ready to demould the part. Lift the edges of the part to help demould and break the part free from the surface. If necessary, work around the flange gently lifting it in places using thin mixing sticks or plastic wedges until the part releases from the mould. Then cut the peel ply edge into strips and rip off each thin strip of peel ply and mesh. You can then trim the part and put it to use!


DISCUSSION (16)

Please share any questions or comments you may have about this video tutorial.


Michael Pikula
In the case where a part requires additional strength or bracing, would it be better to create a "forged carbon" element and bond it after the part is finished infusing, or add it between the layers being infused?
Easy CompositesWarren

It depends how thick or big it is. Certainly if the extra reinforcement is very thick or an odd shape, it may be more efficient to do it as a forged part then bond into place afterwards. 


Taylor Inase
Is the peel ply resin permeable?
Easy CompositesMatt
Yes, the resin will flow through the Peel Ply but it can be torn away from the back of the composite after the resin has cured.

SHIRIRAJ RAO
Is this vacuum infusion applicable for multiple layers of fabrics?
Easy CompositesMatt
Yes, certainly. There is not really any maximum number of layers that can be infused although it's possible that you could run into either problems with the amount of time it takes the resin to get down through many layers (i.e. 10+ layers) whereby the resin could even start to 'gel' before the fabric was fully infused or you could possibly run into problems with the laminate being so thick that the resin 'exotherms' during cure (over-heats) but for either of these to be a problem you'd be looking at 10mm+ of reinforcement which is very unusual.

Lucas Yen
I didn't see the breather used in the video, is it not necessary?
Easy CompositesMatt
No, breather is not normally used with resin infusion. Sometimes if you are envelope bagging a mould, breather can be useful on the reverse to help avoid a rough mould back puncturing a bag.

Abraham George
How do you calculate required CFM for a given area to select the vacuum pump?
Easy CompositesMatt
This is a common question but actually the required CFM of the pump is not related to the area that you're vacuum bagging. A pump of any size can impart the same pressure on a mould the size of a football field as it can on one the size of a postcard. The only reason you might want a higher CFM pump on larger components is to either (a) make the initial pull down faster or (b) overcome leaks if you've not sealed your bag properly. For modest sized components you should always be able to get a properly sealed bag and the pull-down time is not likely to be too long some something like a 1.5CFM pump would be more than adequate.

kerolos amin
How can I make hollow parts (cylinder, tubes and handles) using vacuum infusion?
Easy CompositesMatt
You would need to use a split mould which is still perfectly possible with infusion although you'll often want to 'envelope bag' rather than try to stick the tape around the mould's flange (which you see us do in this video). The actual bag arrangement for hollow shapes like tubes and cylinders is pretty much the same for prepreg or resin infusion and we do have some other tutorials which show the vacuum bagging process for tube structures in more detail.

Nivine Bou
I did not understand why during the sealing of the vacuum tape, you put extra tape?
Easy CompositesMatt
The extra pieces are pleats to allow extra bagging film to be used to ensure enough film is there to avoid bridging and allow the bagging film to drop down into the mould. If the tape just ran around the edge of the mould then the film would just be sealed down tight across the mould (like a drum skin).

Alexander Potselsberger
What if you have a difficult mould. Can you use spray glue to fix the first carbon?
Easy CompositesMatt
You can use the spray tack but only the lightest of dustings otherwise the glue will leave a lot of surface marring to repair.

Ye Qun
Using the resin infusion method how can I control the thickness of the final product?
Easy CompositesMatt
In composites, laminate thickness is pretty much only determined by the layers of reinforcement used. The consolidated thickness of most fabrics is already known (and is really a function of the fibre type and the areal weight of the fabric). For example, a 200gsm twill weave carbon will be 0.2mm thick (under vacuum pressure), a 650gsm twill weave carbon is 0.65mm so, if you had a laminate of - say - 200g carbon, 650g carbon, 200g carbon and then infused it you would get a laminate of (0.2+0.65+0.2) 1.05mm.

Victor Serrano
Can this technique be use on boat body especially on vertical position? Thanks in advance!
Easy CompositesMatt
Yes, resin infusion is a great process for the manufacture of large composite structures, like a boat hull. The resin infusion process is hardly affected by mould geometry/gravity and so is just as well suited to vertical mould surfaces as horizontal ones. In fact, on our regular training courses we infuse small boat hulls as part of the course.

Inacio Horta
Is there any inconvenience using infusion resin instead of laminating resin in a laminate job?
Easy CompositesMatt
It's not a big problem. The main disadvantage to an infusion resin vs a laminating resin for hand laminating is that the very low viscosity of the infusion resin causes it to 'drain' down out of the reinforcement when trying to laminate on steep sides or vertical surfaces, causing the resin to pool/puddle at the bottom. For flat surfaces this isn't a problem and you might actually find that infusion resin makes a better resin for hand laminating in this situation.

Mel 3498
Hi I can control the resin ratio 60:40 58:42 or 55:45 ? How I can change a little bit the ratio during the infusion?
Easy CompositesMatt
The resin to fibre ratio can be changed slightly depending on when you clamp off the resin feed. Care needs to be taken to ensure you don't make the part too dry resulting in pinholes and dry patches or to resin rich, which is just unnecessary weight. The natural ratio for resin infusion is 60:40 (fibre to resin).

Solomon Pasula
What should the viscosity of the epoxy resin be for this process? And also how to consider pot life of the resin for this process?
Easy CompositesMatt
Viscosity of an infusion epoxy should be as low as possible; thicker resins will infuse through the laminate more slowly and really thick resins will barely infuse at all. The viscosity of our IN2 infusion epoxy is around 300 MPa.s.. As for the pot-life, this is determined by how long it will take your infusion to run through. If the infusion will take 40 mins (which would be typical for a part like this) then you would need at least a 1hr pot life if you want to be able to run through using one mix.

SupercarSean
What determines whether or not you lay down a gel coat into the mold before the first layer of carbon? Just preference for appearance/UV protection?
Easy CompositesMatt
Mostly preference. Using an in-mould gelcoat has advantages and disadvantages, as does no coating at all or clear coating the finished part once demoulded. Gelcoat or a clear coat provide protection to the carbon fibre part, especially from UV but also from daily rigours, for example if the part is on a daily use road car. However, they both add a little weight and an extra step into the process and so often, especially for track/race use or for parts that won't by exposed to much weathering, it's often fine to not have any clear coat at all, as you see in this video.

Mavericks Exhaust Systems
You say to check the vacuum by clamping it off for 15mins, does that mean after 15mins no leaks, its considered as perfect vacuum state? What if the gauge does show a small drop.
Easy CompositesMatt
If the needle hasn't moved in the 15 minutes time frame then the vacuum seal is good enough for an infusion. The longer the leak test then the more chance smaller leaks will reveal themselves. If you do see a reduction in vacuum level after 15 mins then it's likely that you would lose too much pressure before the resin cured and so this leak, although small, would need finding and fixing before you run the infusion.

Quantik
What about the gel gun spray and coat? The video about how to make the bonnet shows you applying the gelcoat. Could I make it without the gelcoat and just apply easy release and wax?
Easy CompositesMatt
The Gelcoat is optional. In many mild climates like the UK, you would not even need to lacquer it. Some sunnier climates it might be wise to use a UV Stable lacquer if the part has no gelcoat. Also, it depends on the use for the part, if it's for race or motorsport use then gelcoat is just unnecessary weight and so is generally not used.

LEAVE A COMMENT OR QUESTION

Note: Your name will be abbreviated and your email address will only be used to email you the answer directly

USED IN THIS PROJECT

Although not necessarily an exhaustive list, the following tools and materials, supplied by Easy Composites, were used in this project.

The quantity shown below is the approximate amount used in the project rounded up to the nearest available kit size or quantity.

INFUSION EQUIPMENT & CONSUMABLES
FM100 Infusion Mesh (1050mm) 5m Folded Pack Thumbnail
AFFM100-105-5PKFM100 Infusion Mesh (1050mm) 5m Folded Pack£12.00 /pack

6mm ID Budget PVC Vacuum Hose 5m Thumbnail
VH-PVC6-56mm ID Budget PVC Vacuum Hose 5m£5.95 /pack

FM170 EasyFlow Knitted Infusion Mesh (1250mm) 5m Folded Pack Thumbnail
AFFM170-125-5PKFM170 EasyFlow Knitted Infusion Mesh (1250mm) 5m Folded Pack£14.70 /pack

Resin Infusion Spiral Standard Flow 10m Coil Thumbnail
RISP-M-10Resin Infusion Spiral Standard Flow 10m Coil£3.50 /pack

Total £0.00
VACUUM BAGGING CONSUMABLES
VB160 Vacuum Bagging Film LFT (1520mm) 5m Folded Pack Thumbnail
AFVB160-152LFT-5PKVB160 Vacuum Bagging Film LFT (1520mm) 5m Folded Pack£12.40 /pack

ST150 Vacuum Bagging Sealant Tape 15m Each Thumbnail
VBST150ST150 Vacuum Bagging Sealant Tape 15m Each£5.50 /roll

PP180 Economy Peel Ply Black Tracer (1520mm) 5m Folded Pack Thumbnail
AFPP180-152-5PKPP180 Economy Peel Ply Black Tracer (1520mm) 5m Folded Pack£10.00 /pack

Total £0.00
REINFORCEMENTS
210g 2x2 Twill 3k Carbon Fibre Cloth (1000mm) Thumbnail
CF-22-210-100210g 2x2 Twill 3k Carbon Fibre Cloth (1000mm)£23.00 /linear metre

Total £0.00
MATERIALS & CONSUMABLES
CR1 Easy-Lease Chemical Release Agent 500ml Thumbnail
CR1-05CR1 Easy-Lease Chemical Release Agent 500ml£16.50 /pack

Nitrile Gloves - Box of 100 Large Thumbnail
NG-100-LNitrile Gloves - Box of 100 Large£8.95 /pack

Total £0.00
STARTER KIT(S)
Resin Infusion Starter Kit Thumbnail
SK-RIResin Infusion Starter Kit£145.00 /kit

Total £0.00
TOOLS & EQUIPMENT
10kg High Capacity Digital Scales Thumbnail
SCALE10KG10kg High Capacity Digital Scales£11.63 /each

Resin Infusion Silicone Connector Thumbnail
RI-SCVResin Infusion Silicone Connector£3.25 /each

Professional 10 Inch Carbon Fibre Composites Shears Thumbnail
SC-CK10Professional 10 Inch Carbon Fibre Composites Shears£57.90 /each

CP1 Resin Infusion Catch-Pot 1.2L Thumbnail
RICP-P-SCP1 Resin Infusion Catch-Pot 1.2L£79.95 /each

EC4 Compact Composites Vacuum Pump + UK Lead Thumbnail
VP-EC4-UKEC4 Compact Composites Vacuum Pump + UK Lead£269.50 /each

Resin Infusion Line Clamp Thumbnail
RI-LCResin Infusion Line Clamp£5.25 /each

Total £0.00
RESIN AND EFFECTS
IN2 Epoxy Infusion Resin SLOW 5kg Kit Thumbnail
EP-IN2-S-5IN2 Epoxy Infusion Resin SLOW 5kg Kit£79.75 /kit

Total £0.00

DISCUSSION (16)

Please share any questions or comments you may have about this video tutorial.


Michael Pikula
In the case where a part requires additional strength or bracing, would it be better to create a "forged carbon" element and bond it after the part is finished infusing, or add it between the layers being infused?
Easy CompositesWarren

It depends how thick or big it is. Certainly if the extra reinforcement is very thick or an odd shape, it may be more efficient to do it as a forged part then bond into place afterwards. 


Taylor Inase
Is the peel ply resin permeable?
Easy CompositesMatt
Yes, the resin will flow through the Peel Ply but it can be torn away from the back of the composite after the resin has cured.

SHIRIRAJ RAO
Is this vacuum infusion applicable for multiple layers of fabrics?
Easy CompositesMatt
Yes, certainly. There is not really any maximum number of layers that can be infused although it's possible that you could run into either problems with the amount of time it takes the resin to get down through many layers (i.e. 10+ layers) whereby the resin could even start to 'gel' before the fabric was fully infused or you could possibly run into problems with the laminate being so thick that the resin 'exotherms' during cure (over-heats) but for either of these to be a problem you'd be looking at 10mm+ of reinforcement which is very unusual.

Lucas Yen
I didn't see the breather used in the video, is it not necessary?
Easy CompositesMatt
No, breather is not normally used with resin infusion. Sometimes if you are envelope bagging a mould, breather can be useful on the reverse to help avoid a rough mould back puncturing a bag.

Abraham George
How do you calculate required CFM for a given area to select the vacuum pump?
Easy CompositesMatt
This is a common question but actually the required CFM of the pump is not related to the area that you're vacuum bagging. A pump of any size can impart the same pressure on a mould the size of a football field as it can on one the size of a postcard. The only reason you might want a higher CFM pump on larger components is to either (a) make the initial pull down faster or (b) overcome leaks if you've not sealed your bag properly. For modest sized components you should always be able to get a properly sealed bag and the pull-down time is not likely to be too long some something like a 1.5CFM pump would be more than adequate.

kerolos amin
How can I make hollow parts (cylinder, tubes and handles) using vacuum infusion?
Easy CompositesMatt
You would need to use a split mould which is still perfectly possible with infusion although you'll often want to 'envelope bag' rather than try to stick the tape around the mould's flange (which you see us do in this video). The actual bag arrangement for hollow shapes like tubes and cylinders is pretty much the same for prepreg or resin infusion and we do have some other tutorials which show the vacuum bagging process for tube structures in more detail.

Nivine Bou
I did not understand why during the sealing of the vacuum tape, you put extra tape?
Easy CompositesMatt
The extra pieces are pleats to allow extra bagging film to be used to ensure enough film is there to avoid bridging and allow the bagging film to drop down into the mould. If the tape just ran around the edge of the mould then the film would just be sealed down tight across the mould (like a drum skin).

Alexander Potselsberger
What if you have a difficult mould. Can you use spray glue to fix the first carbon?
Easy CompositesMatt
You can use the spray tack but only the lightest of dustings otherwise the glue will leave a lot of surface marring to repair.

Ye Qun
Using the resin infusion method how can I control the thickness of the final product?
Easy CompositesMatt
In composites, laminate thickness is pretty much only determined by the layers of reinforcement used. The consolidated thickness of most fabrics is already known (and is really a function of the fibre type and the areal weight of the fabric). For example, a 200gsm twill weave carbon will be 0.2mm thick (under vacuum pressure), a 650gsm twill weave carbon is 0.65mm so, if you had a laminate of - say - 200g carbon, 650g carbon, 200g carbon and then infused it you would get a laminate of (0.2+0.65+0.2) 1.05mm.

Victor Serrano
Can this technique be use on boat body especially on vertical position? Thanks in advance!
Easy CompositesMatt
Yes, resin infusion is a great process for the manufacture of large composite structures, like a boat hull. The resin infusion process is hardly affected by mould geometry/gravity and so is just as well suited to vertical mould surfaces as horizontal ones. In fact, on our regular training courses we infuse small boat hulls as part of the course.

Inacio Horta
Is there any inconvenience using infusion resin instead of laminating resin in a laminate job?
Easy CompositesMatt
It's not a big problem. The main disadvantage to an infusion resin vs a laminating resin for hand laminating is that the very low viscosity of the infusion resin causes it to 'drain' down out of the reinforcement when trying to laminate on steep sides or vertical surfaces, causing the resin to pool/puddle at the bottom. For flat surfaces this isn't a problem and you might actually find that infusion resin makes a better resin for hand laminating in this situation.

Mel 3498
Hi I can control the resin ratio 60:40 58:42 or 55:45 ? How I can change a little bit the ratio during the infusion?
Easy CompositesMatt
The resin to fibre ratio can be changed slightly depending on when you clamp off the resin feed. Care needs to be taken to ensure you don't make the part too dry resulting in pinholes and dry patches or to resin rich, which is just unnecessary weight. The natural ratio for resin infusion is 60:40 (fibre to resin).

Solomon Pasula
What should the viscosity of the epoxy resin be for this process? And also how to consider pot life of the resin for this process?
Easy CompositesMatt
Viscosity of an infusion epoxy should be as low as possible; thicker resins will infuse through the laminate more slowly and really thick resins will barely infuse at all. The viscosity of our IN2 infusion epoxy is around 300 MPa.s.. As for the pot-life, this is determined by how long it will take your infusion to run through. If the infusion will take 40 mins (which would be typical for a part like this) then you would need at least a 1hr pot life if you want to be able to run through using one mix.

SupercarSean
What determines whether or not you lay down a gel coat into the mold before the first layer of carbon? Just preference for appearance/UV protection?
Easy CompositesMatt
Mostly preference. Using an in-mould gelcoat has advantages and disadvantages, as does no coating at all or clear coating the finished part once demoulded. Gelcoat or a clear coat provide protection to the carbon fibre part, especially from UV but also from daily rigours, for example if the part is on a daily use road car. However, they both add a little weight and an extra step into the process and so often, especially for track/race use or for parts that won't by exposed to much weathering, it's often fine to not have any clear coat at all, as you see in this video.

Mavericks Exhaust Systems
You say to check the vacuum by clamping it off for 15mins, does that mean after 15mins no leaks, its considered as perfect vacuum state? What if the gauge does show a small drop.
Easy CompositesMatt
If the needle hasn't moved in the 15 minutes time frame then the vacuum seal is good enough for an infusion. The longer the leak test then the more chance smaller leaks will reveal themselves. If you do see a reduction in vacuum level after 15 mins then it's likely that you would lose too much pressure before the resin cured and so this leak, although small, would need finding and fixing before you run the infusion.

Quantik
What about the gel gun spray and coat? The video about how to make the bonnet shows you applying the gelcoat. Could I make it without the gelcoat and just apply easy release and wax?
Easy CompositesMatt
The Gelcoat is optional. In many mild climates like the UK, you would not even need to lacquer it. Some sunnier climates it might be wise to use a UV Stable lacquer if the part has no gelcoat. Also, it depends on the use for the part, if it's for race or motorsport use then gelcoat is just unnecessary weight and so is generally not used.

LEAVE A COMMENT OR QUESTION

Note: Your name will be abbreviated and your email address will only be used to email you the answer directly

100% SECURE

    Secured by Digicert Payments by Adyen

PAYMENT METHODS

    Mastercard logo Visa logo Maestro logo PayPal logo Bank Transfer logo
    Staffordshire Chambers of Commerce member Composites UK member

Easy Composites Ltd, registered in England 7486797. All content copyright (C) Easy Composites Ltd, 2024. All rights reserved.