Need any help or advice?![]() +44 (0)1782 454499
+44 (0)1782 454499
USED IN THIS PROJECT
Although not necessarily an exhaustive list, the following tools and materials, supplied by Easy Composites, were used in this project.
The quantity shown below is the approximate amount used in the project rounded up to the nearest available kit size or quantity.
MOULD MAKING MATERIALS

PATTERN MAKING MATERIALS
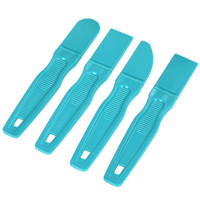
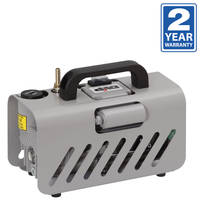
TOOLS & EQUIPMENT


ANCILLARIES
COMPONENT MATERIALS
VACUUM BAGGING CONSUMABLES
MATERIALS & CONSUMABLES

VIDEO TUTORIAL
Using Low-Melt Metal Cores to Mould Hollow Components
In this composites training video, we demonstrate how low-melting point metal alloys can be used as sacrificial cores/mandrels when manufacturing hollow composite structures.
The process can be used to produce complex hollow structures, such as tubes or frame components by laminating prepreg carbon fibre around a cast metal mandrel, which is then cured at elevated temperature before the temperature is increased further to melt-out the metal core, leaving the hollow composite structure.
This process can be used in situations where a hollow component is needed and methods like roll-wrapping or split tooling with a bag or bladder are not suitable or impractical. Melt-out metal mandrels are also particularly suitable where the inside surface is the priority surface, such as induction tubes.
INTRODUCTION
Introduction
In this video we will be showcasing how to make hollow parts using low melting temperature alloys as a mandrel. These are then wrapped in a pre-preg which is oven cured before melting out the alloy metal.
This is especially useful for methods where it would be impossible to get a vacuum bag or bladder into the inside of the part or for complex parts and where you need to have the inside of the part to have a reasonably good finish - such as with this intake tube.
The basic process involves making a pattern of the mandrel. A silicone mould is then taken from the pattern and used to cast the low melt alloy. The mandrel is then wrapped in pre-preg carbon fibre and cured at a temperature lower than the melting point of the alloy. The alloy can then be melted out for re-use later.
In this video we will show 2 methods of consolidating the pre-preg laminate. The first is using shrink tape for this induction tube., the second, using a vacuum bag. The vacuum bag method is useful when the shape (such as on this wishbone) is such that using shrink tape would be impractical to due sharp edges and other details.
STEP-BY-STEP GUIDE

1. Making The Pattern
The pattern represents the inside geometry of the finished part and in cases where accuracy is important, this should be taken into account and a suitable offset used if needs be.
In this case we have 3D printed a pattern for one item and CNC machined the wishbone pattern from PU model board. If CNC is not available, the pattern could also easily be shaped by hand from many materials such as wood and MDF or a mould taken from the original part directly.
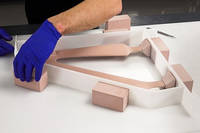
2. Setting up Barriers for the Silicone Mould
The mould is made from silicone. With the high service temperature of 250C, the silicone is ideal as it can withstand the temperature needed to cast the the low melt alloys.
To cast the silicone you will need to create barriers around the pattern to pour the silicone. In the case of the induction tube, We 3D printed some barriers by creating an offset from the original pattern. Generally to create a strong and stable mould, a 20mm thickness for the silicone mould is generally ideal
Where you do not have access to 3D printed or existing barriers, it is relatively easy to construct barriers as is the case for the wishbone. In this case we are using cut sheets of polypropylene as it is easy to use, although almost any material could be used.
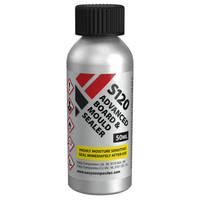
To aid with pouring the metal, some simple spacers have been made and bonded to the pattern to act as funnels for the molten metal. The pattern has been sealed with several coats of S120 Board Sealer, although not essential and the silicone will release from the board, the sealer gives a higher gloss and smoother finish.
The spacer funnels are bonded to the model board using super glue. The pattern needs to be suspended so a couple of dowel features are added to the wishbone. The pattern is then bonded onto the baseboard using hot melt glue and the barriers can be shaped and bonded into place. Blocks of board are used to buttress and support the barriers as there will be considerable weight of silicone against the barriers. Hot melt glue is then used to fully seal the barriers into place. On the 3D printed pattern, filleting wax is used to seal the flanges of the barriers for a good seal.
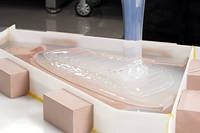
3. Pouring the Silicone Moulds
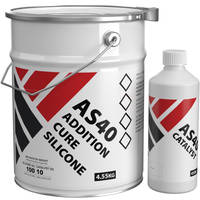
For the mandrel moulds we will be using the AS40 Addition cure silicone with a service temperature of 250°C, well above the melting point of the low melt alloys.
The Silicone is accurately measured out using scales, and then thoroughly mixed. Although not essential, if you have degassing facilities available, the silicone can be degassed to remove any trapped air. The silicone is then poured into the moulds and given 24 hours to fully cure.
Once the silicone has fully cured, it is time to remove the barriers and extract the pattern from the silicone moulds. As silicone self releases from most materials, the patterns should easily release from the mould.
After a clean up, a scalpel is used to split the moulds. The process is to carefully cut the moulds along the split line. Precision is not so critical as a slightly wavy edge will help with registering and sealing the 2 halves of the mould back together again for the metal pour. Keep teasing the halves apart while you cut until the pattern can be extracted from the mould.
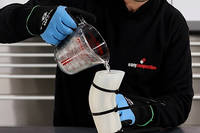
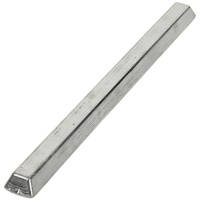
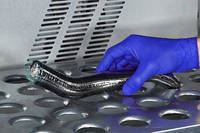
4. Casting the Low-Melt Metal Mandrel
Now that the silicone moulds are complete, it is time to cast the alloy metals. Gloves should always be warn when handling LM95 due to its lead content.
To work out how much metal alloy is needed, it is important to work out the volume of the mould cavity. Where CAD has been used, this is relatively easy as the software will usually be able to tell you that information. In other cases where it is unknown, such as with a hand shaped pattern, filling the mould with water, then pouring it out to measure the volume is the quickest and easiest method.
Once you know the volume in litres, multiply by 9.7 to get the weight of LM95 in Kilos. In the case of the induction tube, the volume is 0.3 Litres meaning 2.91kg of alloy is needed. In the case of the wishbone, the volume is 0.53 Litres meaning 5.14kg of alloy is needed. As the metal is completely reusable it does not matter if a bit extra is melted so 3kg is used for the induction tube and 6kg for the wishbone.
Due to the weight of the metal being cast, the mould halves will need to be supported and clamped together so that they do not separate and cause a link. For the wishbone, some simple plates are made for each side, then clamped together. For the induction tube, cable ties secured at regular intervals provide enough compression to support that mould.
The LM95 melts at 95°C but to ensure the metal does not solidify when pouring against the cold mould or just during the pouring process, we are heating it to 130°C. In this case we use our OV301 curing oven to heat up the alloy but any oven should be capable as precise temperature control is not needed. For the induction tube casting, it took approximately 1 hour to begin to melt and a further hour to melt completely. The time this takes will vary depending on the power of the oven and mass of metal being melted.
Although the LM95 contains lead, the temperatures involved are not high enough to cause any vapour issues so normal handling precautions are fine. If you want to avoid lead completely, or if the pre-preg you are using has a higher cure temperature, then the LM138 is lead free. The LM138 melts at 138°C.
With the metal at the required temperature, it can be carefully poured into the mould. The container is heavier than it looks so take care to support and ensure you are wearing good quality high temperature gloves. For larger pours you can split the metal into several jugs to make handling much easier. You will note, especially on bigger casts, a small amount of shrinkage as it cools.
Once the metal has fully cured, the mandrels can be removed from the mould. The AS40 releases easily from the metal without the use of a release agent making the demoulding process simple and quick.
The complete castings have come out with a very good surface and all that needs doing is minor finishing before using them. The unwanted casting features are simply cut off, The surface is already very smooth so does not need any further finishing work.
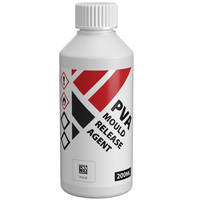
To pre-pare the castings for the laminating process, a release agent will need to be applied. This helps ensure there is not a film of metal left on the inside of the finished part. Although not essential, the release agent can help ensure the metal comes off cleanly leaving a smooth inside to the part. Through experimentation, the best release agent to use is PVA release agent. It is simply brushed on in an even layer all over the surface then allowed to dry.
5. Laminating the Components
For this project, the XC130 pre-preg system is being used. For the Induction tube, a single layer of the XC130 210g cloth is used and for the wishbone, the XC130 210g is used as well as multiple layers of the XC130 UD fabric. Pre-preg is a form of carbon or glass fabric pre-impregnated with resin. These resins will stay uncured at room temperature for weeks or sometimes months then cure in an oven in a few hours. Further details on processing pre-preg materials can be found in other videos we have produced dedicated to the process.
Templates are used to help cut the pieces of pre-preg for the laminating process and the pieces are cut and prepared ready to laminate for both the induction tube and the wishbone. The shape does not need to be too precise for this as the final trimming will be completed as the pre-preg is laid up onto the mandrel.
The induction tube uses only a single ply of 210g to keep weight to a minimum, First one half is laid onto the mandrel and trimmed, The second half is laid onto the other side then carefully trimmed once over lapped and firmly pressed into place.
Pre-pregs are ideally suited to this kind of process due to their tacky nature and higher temperature resistance. It is technically possible to do this process with a wet lay up and resins but generally such resin systems do not have the required temperature resistance for the melt out process leaving pre-pregs as the preferred choice of material.
For the wishbone, the process starts with a layer of the XC130 210 cloth then with additional layers of the XC130 UD. The wishbone is for a recumbent trike project so the layup is closer in similarity to a bike frame than you might expect for an automotive wishbone. The application of the pre-preg is helped greatly by using pre-preg dibber tools to ensure the laminate is fully consolidated into tight corners and features. For difficult features, the pre-preg can be cut and overlapped to ensure full coverage and consolidation.
Multiple layers of uni-directional fibres are added to give the strength to the wishbone before a final layer of the XC130 210g is added. It is common practice when using Uni-directional fabrics to sandwich them with a woven cloth for durability reasons. UD fabrics are vulnerable to splitting, especially when used over longer lengths, so the woven fabric helps keep those unidirectional fabrics protected and bound together.
6. Curing the Pre-preg
Two different methods of consolidation are used at this stage. For the Induction tube, the shrink tape method is perfect. For the wishbone, the complex shape and details mean that the shrink tape method would not work. In this case a more conventional vacuum bagging process is used.
With the induction tube, The shrink tape is applied for the consolidation. With shrink tape, a reasonable level of tension needs to be maintained throughout and for each wrap, only progress about 3mm at a time for each revolution. Once fully wrapped, the end of the tape can be secured with some flash release tape.
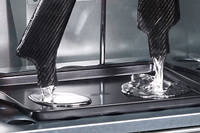
The bagging process is very similar to other processes seen with pre-preg with the exception that a breather layer is not used to help keep a smoother surface finish to the part. The Unperforated Release Film is applied to the wishbone carefully to ensure the surface is properly covered. Small minor creases are not a problem as any resin residue will be easily removed during the finishing process.
An envelope vacuum bag is then produced using our VB160 film and ST150 Gum Sealing Tape. A small amount of breather is placed under the through-bag connector, the wishbone is placed in the bag and the bag is then sealed. Vacuum is drawn and a leak test is conducted to ensure a good bag has been produced.
Both the items are placed in the OV301 Composites Curing Oven and then the initial cure is done at 80°C for several hours. The cure cycle may vary depending on the specific pre-preg you are using so we recommend referring to the specific pre-preg documentation. Once the parts have cured, the vacuum bag and shrink tape is then removed.
7. Melting Out the Metal Mandrel/Core
At this stage, it is time to melt out the core. Using a laboratory stand or similar to clamp and support the part, it can be returned to the oven for the melt out. At this stage, the pre-preg has not had a full post cure so it is important to raise the temperature progressively to avoid the resin softening too much in the pre-preg. In this case we are using the XC130 post cure cycle for the melt out.
The Cure cycle goes up to 130°C so when the LM95 gets to 95°C, it will begin to melt. As the alloy tends to melt at the top first, this can lead to quite a dramatic melt out when the bottom finally melts and the alloy drops out in one go. In some industry, a hot oil bath is used for melt outs, but a simple oven melt out is generally more practical.
8. Finishing Work
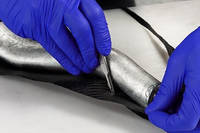
Now that the alloy has melted out, the parts are both light and strong. With the induction tube, there is still a small trace amount of metal on the inside. Due to the PVA release agent, the tube can be placed in a water bath to help soften the PVA coating.
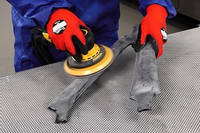
The wishbone has a slightly rough textured outer finish due to the nature of the bagging process. Using 120 grit paper, the high spots on the surface are flatted. It is not necessary to completely flatten the whole surface. The aim is to remove the high spots, flash lines and to provide a good key for the resin coating. The majority of the flat surfaces can be quickly flatted using a DA sander with the finer detail sanded by hand. The process only took about 5 minutes.
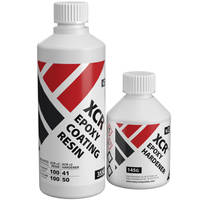
The wishbone is cleaned with a quick wipe with acetone. A small batch of XCR is then mixed up and applied to the wishbone. The aim is to apply an even thick coating but not so thick that the resin drains runs off the surface. Any drips can be removed with the brush. The wishbone is then left for 2-3 hours to achieve the B stage of the cure which is firm but still tacky. Another 2 coats are applied in the same fashion giving 3 coats in total. The part is then left to fully cure.
The Part is now flatted, starting with 240 grit abrasive papers before moving onto a finer 400 grit paper. This can again be done with a DA sander with fine detail being finished by hand. The aim is to get a completely flat and smooth surface. Care should be taken to avoid breaking into the carbon beneath, although minor breakthroughs just onto the surface should be fine. For the wishbone, this is finished using a single spray coat of the Phantom Clear satin clear coat. If a gloss finish is required, a thin final brush coat of the XCR resin can be applied.
Now the paint is drying on the wishbone, it is the ideal time to finish off the induction tube which has been soaking to loosen the PVA. The metal residue can now be removed with a bristle brush on the inside of the tube. The water bath can be used to clean many components before needing to dispose of the water - preferably by evaporation - before recovering the metal residue. Such residue should not be poured down the drain. The ends are then dressed with a sanding block and the part is finished.
Once the clear coat has dried, the wishbone is also complete. The combination of the XCR coating resin and the Phantom Clear has given a high quality surface finish that would be hard to tell apart from the finish on a part made using a 2 part closed moulding.
DISCUSSION (8)
Please share any questions or comments you may have about this video tutorial.
You can do a sacrificial core moulding process using PVA print but there are some compromises, including the fact that you can't use prepreg (which does make the process a lot more practical, and successful) and you would have to reduce, or eliminate, any consolidation pressure (like a vacuum bag or shrink tape) in order to avoid compressing and distorting the mould. But for prototypes, iterations or less demanding requirements, hand laminating over a PVA core and then dissolving (over a considerable time) the PVA core is definitely an option.
Most waxes have a melting temperature that is below the curing temperature of the prepreg. Beeswax for example melts at 60-62C which means it would melt away long before the prepreg had reached its initial cure. Also, as waxes approach their melting point, they are already softening, which leads to distortion of the component, especially under vacuum / shrink tape pressure. For ambient temperature cure processes though (ie hand layup, rather than prepreg) wax mandrels are an option.
Acetone will attack ABS to an extent but it wouldn't allow you to properly melt-out an ABS core/mandrel. There are alternatives to low-melt alloys including soluble salt cores and semi-soluble 3D print materials. Generally, we'd say that this technology (soluble 3d prints) perhaps isn't yet quite where it needs to be in order to be as effective as a low-melt alloy but it is something we've worked with and may feature in a future video. Salt cores are interesting too, but generally need a lot more equipment to process.
XC110 is developed specially for ‘pin hole free surface finish’ when used as a 1-3 ply laminate in a mould, cured under vacuum only. However, in this application, the outside of the part is going to need lots of finishing work anyway, so a pin hole free finish isn’t really relevant. What is more relevant is the 130C Tg of the XC130 prepreg, compared to the 110C of the XC110 - which means we can use a higher melt-out temperature, and the slightly better mechanical properties of the XC130.
Different metals, in different ratios, produce alloys with specific properties. To create an alloy with a sharp melting point at around 95C requires a tin-bismuth-lead alloy. Removing the lead raises the melting point to 138C, hence our lead-free LM138 alloy. The ideal scenarios come down to the cure temperature of the resin used in the laminate (in this case the prepreg), and the maximum temperature that the resin can take, for the melt-out. 95C is high enough to allow the prepreg to be cured without softening the metal whilst the prepreg itself can withstand the 100C required to melt-out the metal. In the case of LM138, the prepreg used would need to be able to withstand the 140C needed to melt-out the metal, but it does mean that the initial cure could be done up to 135C, which would be useful for prepregs which require a higher minimum initial cure temperature.
most components like this achieve a higher strength to weight ration by being hollow. A foam core of sufficient density to take a reasonable amount of consolidation pressure would weigh many grams and add little to the stiffness of the finished component. That said, there definitely are times when laminating around the outside of a core that’s left in is a good way to go. You need a core that can take prepreg curing temperatures, like Rohacell.
A melt-out metal core could be used with a conventional wet-lay process (using dry carbon fabric and liquid resin) but you would need to make sure that the resin you use can withstand the temperaure required to melt out the metal. In this case, that would be about 100C. A typical laminating resin, like our EL2, woudn't be able to take this temperature, but a higher temperature resin, such as our EL160, would be quite comfortable at this temperature. It is worth remember though that the actual practicalities of laminating dry fabric and wet resin around a tight tubular form do make prepreg a lot easier to laminate.
Yes, certainly; but it might get a bit messy. If you were working with a forged carbon fibre prepreg then it would be exactly the same as the process you see here. If you were working with dry chopped tow and wet resin then providing you can successfully get your chopped tow laminate around the mandrel, and you're working with a resin system that can take the 95C temperature needed to melt-out the metal (such as our EL160), then yes, you could do this with wet-lay forged carbon too.
LEAVE A COMMENT OR QUESTION
USED IN THIS PROJECT
Although not necessarily an exhaustive list, the following tools and materials, supplied by Easy Composites, were used in this project.
The quantity shown below is the approximate amount used in the project rounded up to the nearest available kit size or quantity.
MOULD MAKING MATERIALS
PATTERN MAKING MATERIALS
TOOLS & EQUIPMENT
ANCILLARIES
COMPONENT MATERIALS
VACUUM BAGGING CONSUMABLES
MATERIALS & CONSUMABLES
DISCUSSION (8)
Please share any questions or comments you may have about this video tutorial.
You can do a sacrificial core moulding process using PVA print but there are some compromises, including the fact that you can't use prepreg (which does make the process a lot more practical, and successful) and you would have to reduce, or eliminate, any consolidation pressure (like a vacuum bag or shrink tape) in order to avoid compressing and distorting the mould. But for prototypes, iterations or less demanding requirements, hand laminating over a PVA core and then dissolving (over a considerable time) the PVA core is definitely an option.
Most waxes have a melting temperature that is below the curing temperature of the prepreg. Beeswax for example melts at 60-62C which means it would melt away long before the prepreg had reached its initial cure. Also, as waxes approach their melting point, they are already softening, which leads to distortion of the component, especially under vacuum / shrink tape pressure. For ambient temperature cure processes though (ie hand layup, rather than prepreg) wax mandrels are an option.
Acetone will attack ABS to an extent but it wouldn't allow you to properly melt-out an ABS core/mandrel. There are alternatives to low-melt alloys including soluble salt cores and semi-soluble 3D print materials. Generally, we'd say that this technology (soluble 3d prints) perhaps isn't yet quite where it needs to be in order to be as effective as a low-melt alloy but it is something we've worked with and may feature in a future video. Salt cores are interesting too, but generally need a lot more equipment to process.
XC110 is developed specially for ‘pin hole free surface finish’ when used as a 1-3 ply laminate in a mould, cured under vacuum only. However, in this application, the outside of the part is going to need lots of finishing work anyway, so a pin hole free finish isn’t really relevant. What is more relevant is the 130C Tg of the XC130 prepreg, compared to the 110C of the XC110 - which means we can use a higher melt-out temperature, and the slightly better mechanical properties of the XC130.
Different metals, in different ratios, produce alloys with specific properties. To create an alloy with a sharp melting point at around 95C requires a tin-bismuth-lead alloy. Removing the lead raises the melting point to 138C, hence our lead-free LM138 alloy. The ideal scenarios come down to the cure temperature of the resin used in the laminate (in this case the prepreg), and the maximum temperature that the resin can take, for the melt-out. 95C is high enough to allow the prepreg to be cured without softening the metal whilst the prepreg itself can withstand the 100C required to melt-out the metal. In the case of LM138, the prepreg used would need to be able to withstand the 140C needed to melt-out the metal, but it does mean that the initial cure could be done up to 135C, which would be useful for prepregs which require a higher minimum initial cure temperature.
most components like this achieve a higher strength to weight ration by being hollow. A foam core of sufficient density to take a reasonable amount of consolidation pressure would weigh many grams and add little to the stiffness of the finished component. That said, there definitely are times when laminating around the outside of a core that’s left in is a good way to go. You need a core that can take prepreg curing temperatures, like Rohacell.
A melt-out metal core could be used with a conventional wet-lay process (using dry carbon fabric and liquid resin) but you would need to make sure that the resin you use can withstand the temperaure required to melt out the metal. In this case, that would be about 100C. A typical laminating resin, like our EL2, woudn't be able to take this temperature, but a higher temperature resin, such as our EL160, would be quite comfortable at this temperature. It is worth remember though that the actual practicalities of laminating dry fabric and wet resin around a tight tubular form do make prepreg a lot easier to laminate.
Yes, certainly; but it might get a bit messy. If you were working with a forged carbon fibre prepreg then it would be exactly the same as the process you see here. If you were working with dry chopped tow and wet resin then providing you can successfully get your chopped tow laminate around the mandrel, and you're working with a resin system that can take the 95C temperature needed to melt-out the metal (such as our EL160), then yes, you could do this with wet-lay forged carbon too.
LEAVE A COMMENT OR QUESTION
100% SECURE
PAYMENT METHODS


Easy Composites Ltd, registered in England 7486797. All content copyright (C) Easy Composites Ltd, 2024. All rights reserved.