Need any help or advice?![]() +44 (0)1782 454499
+44 (0)1782 454499
PRODUCTS USED IN THIS PROJECT
Although not necessarily an exhaustive list, the following tools and materials, supplied by Easy Composites, were used in this project.
The quantity shown below is the approximate amount used in the project rounded up to the nearest available kit size or quantity.
TOOLS & EQUIPMENT

MATERIALS & CONSUMABLES
REINFORCEMENTS

POLISHING
VIDEO TUTORIAL
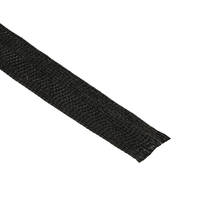
Composite Canoe/Kayak Seam Repair Using Aramid Flat Braid
Composite canoes and kayaks, especially those with a whitewater focus, are often subject to various knocks and bangs. Regular maintenance will keep them looking and performing in the best shape possible. One of the most common jobs is to replace damaged seam tape which is often found on the tail and nose of these boats. This aramid tape is used as a sacrificial protection and in time will wear through, exposing the more fragile fibres beneath, replacing the tape on a regular basis will continue offering protection to the more vulnerable areas of the boat.
WHAT YOU WILL LEARN
In this video tutorial we cover the process of repairing a composite racing kayak by replacing the damaged seam tape on the nose and tail. The guide will cover the following steps.
- How to remove any old and damaged tape.
- Assess any damage beyond the seam tape and add a protective wear patch.
- How to prepare the area for the new seams.
- How to wet out and apply the replacement seam tape.
TUTORIAL BREAKDOWN
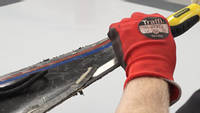
1. Remove the old, damaged tape
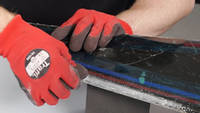
The best way to remove the old tape is to lift up an edge using a chisel. Once accessible, a pair of pliers can be used to twist off the tape along the length. If the tape is broken into multiple sections, the process can be repeated until all of the old material has been removed.
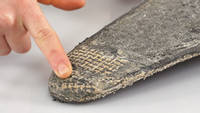
2. Assess the area for damage or wear
Now that the tape is out of the way, it becomes easier to check for any more damage to these vulnerable areas of the boat. There could be fractures or cracks that may require a patch repair. Also check the very ends of the boat for damage, if the tape has worn through then the structural material underneath may also have begun to wear.
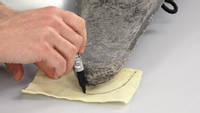
3. Optional: Measure up wear patch if needed.
If needed, a wear patch can be added to build up any material which may have worn away. This may also be done as a preventative measure and can be treated as a sacrificial patch to protect any areas prone to damage.
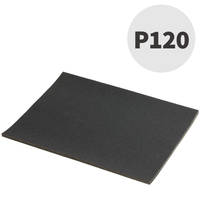
The area for the patch will need to be prepared by keying with a course 120 grit abrasive. Kevlar felt provides a highly resilient yet tidy way to add some additional protection. This can be offered up to the section of boat and traced to get an approximate size. Using Kevlar shears or scissors it can then be cut to shape and made to fit.
4. Optional: Laminate Kevlar wear patch.
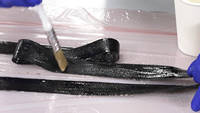
It is important to ensure the Kevlar wear patch is fully saturated with resin to ensure a strong and resilient result. A good tip is to wet out the patch off the boat, using a piece of release film taped down to protect the workspace allows the patch to be laminated from both sides. A good indicator that the material is fully saturated is when the colour darkens, at this point it's ready to be applied to the boat.
Once the resin has cured hard, the patch can be sanded and blended in with the shape of the boat.
5. Preparation for seams
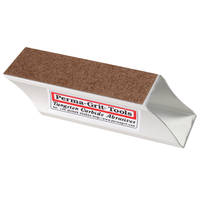
Applying tape to mask off the area to be sanded is not compulsory but it does provide a guide to key up to and prevent over-sanding onto the main areas of the boat. It will also help to ensure that resin doesn't spread too far when the seam tape is applied and ensure that the repair stays neat. 120 grit abrasive should be used to remove any cured resin, key up and clean the surface where the new tape will sit. This keying of the surface will allow the new resin to form a good bond and keep the new seam attached.

6. Measuring and cutting the tape
A good way to work out the correct length of tape is to offer it up to the boat and mark it for size.
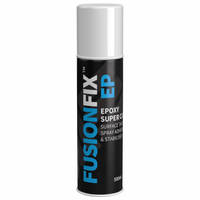
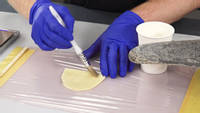
To produce a neat cut and prevent fraying to the end of the tape a light spray of Fusion Fix EP will help to stabilise the fabric and prevent any fibres from coming loose. Simply spray on the area to cut and wait for the tackiness to subside. Kevlar shears or scissors make cutting tenacious fibres like Kevlar far easier than regular scissors and make for a much neater edge.
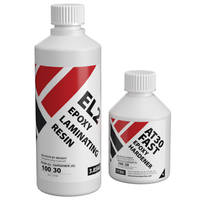
7. Resin preparation
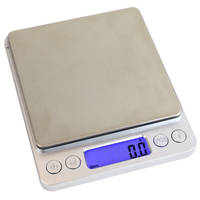
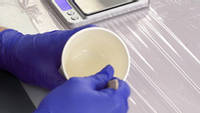
Whilst this repair requires only a relatively small amount of resin, very small batches of resin can cause issues with ratio of resin and hardener. A small error when weighing out the resin can throw out the ratio by a significant amount which in turn can prevent the resin from curing properly. We recommend that 50g should be the smallest batch size to mix up which can help mitigate any issues by reducing the impact of any errors.
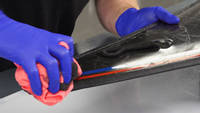
8. Laminating the tape
To make laminating the tape onto the edges of the boat easier, the off the boat technique can be used again. This helps to avoid the tricky situation of the dry loose end hanging down and dragging the partially laminated tape off the edge as you try and wet it out. This method also means that you can again fully ensure that the tape is fully saturated with resin. Finding the halfway point in the length of tape and lining this up with the end of the boat will ensure that the tape is symmetrical on both sides.
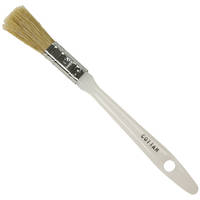
Once in position it can be folded over the top and bottom and manipulated into place. If any more resin is required, it can be brushed over the tape at this point to ensure an even coating.
9. Cure and Polish
When the resin has thickened to the gel stage, the masking tape can carefully be removed to leave a nice crisp edge.
The resin can then be left to cure until fully hardened. If desired, a further coat of resin can then be brushed over the surface to provide even more protection, this can even be thickened with fumed silica to produce a resin with a gel like consistency.
It is important to ensure that the resin has reached its full cure before going back into service. A top tip at this point is to just buff over the area with some polishing compound. Some epoxies can produce a slightly reactive surface when cured with an open face and exposed to the air, as it was in this case. This reactive layer is only on the very top surface of resin but it can react with water, causing a cloudy white effect known as blooming. To avoid this, the surface can be polished to remove the reactive material and prevent the resin from changing colour when it first gets wet.
The repair is then finished and the boat given a new lease of life, ready to get straight back on the river.
DISCUSSION (0)
Please share any questions or comments you may have about this video tutorial.
LEAVE A COMMENT OR QUESTION
PRODUCTS USED IN THIS PROJECT
Although not necessarily an exhaustive list, the following tools and materials, supplied by Easy Composites, were used in this project.
The quantity shown below is the approximate amount used in the project rounded up to the nearest available kit size or quantity.
TOOLS & EQUIPMENT
MATERIALS & CONSUMABLES
REINFORCEMENTS
POLISHING
DISCUSSION (0)
Please share any questions or comments you may have about this video tutorial.
LEAVE A COMMENT OR QUESTION
100% SECURE
PAYMENT METHODS


Easy Composites Ltd, registered in England 7486797. All content copyright (C) Easy Composites Ltd, 2025. All rights reserved.