Need any help or advice?+44 (0)1782 454499
Downloads (1)
| Penny Floor Handbook |
USED IN THIS PROJECT
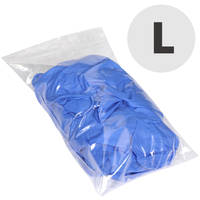
Although not necessarily an exhaustive list, the following tools and materials, supplied by Easy Composites, were used in this project.
The quantity shown below is the approximate amount used in the project rounded up to the nearest available kit size or quantity.
VIDEO TUTORIAL
How to Lay an Epoxy Resin Penny Floor
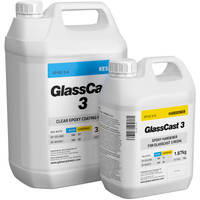
GlassCast® 3 is a remarkable clear epoxy resin developed specifically to provide a beautiful, hard wearing, clear gloss surface for tabletops, bartops, decorative floor effects, furniture and creative projects such as penny floors, bottle top tables, crushed glass features and more.
This step by step guide will show you how to do a copper penny floor using simple equipment and techniques from start to finish. The same technique can be used for a range of similar projects such as encapsulating records, bottle tops, crushed glass and even advanced composite materials such as carbon fibre for a new technical look
TUTORIAL BREAKDOWN
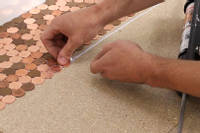
1. Laying the pennies
First of all ensure your floor is as level as you can practically achieve as well as clean and free from dust and debris. You then want to glue down your penny's. Any good quality DIY adhesive will be suitable. Only a thin bead is needed to hold the penny's in place as the resin itself will bond the penny's to the floor. We chose a glue that cures clear to help see when it is dry and ready for the next stage. Allow the glue to cure fully before moving onto the next stage
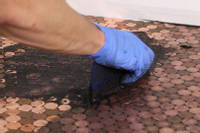
2. Grouting the floor
Grouting the floor helps produce a smoother overall finish in the resin and also fills the gaps between the pennies to create a nicer looking floor. Any good quality black grout is suitable. Apply the grout according to the manufacturers instructions using a squeegee to help spread the grout and fill any gaps. Once the grout has been applied and cleaned up, allow it to fully dry before moving onto the next stage. The grout MUST be dry before resin is poured onto it as the GlassCast 3 is sensitive to moisture which could seriously damage the cosmetic effect and cure of the resin.
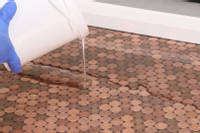
3. Mixing and pouring the GlassCast® 3 resin
Once the grout is fully dry, give the floor a quick sweep and vacuum clean to ensure there is no dust or loose debris that could ruin the resin pour.
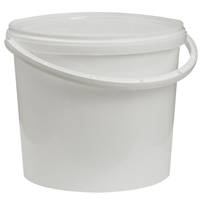
This step describes how to resin a penny floor, for large floors, the biggest batch size we recommend doing in one go is 5kg of combined resin and hardener. Label up two buckets 1 and 2. Using bucket 1, weigh out the GlassCast® 3. Remember to follow the mixing ratio of 2 parts resin to 1 part hardener by weight. Using a clean mixing stick, thoroughly mix the resin and hardener for 3 minutes taking care to ensure all the resin from the top to the bottom and right around the sides is fully mixed. Once 3 minutes have elapsed, transfer the resin in bucket 1 into bucket 2. Mix thoroughly for a further 3 minutes.
Once the Resin is mixed in bucket 2, immediately begin to pour the resin onto the penny floor. You must work quickly at this stage to prevent the resin exotherming in the bucket. Once the bucket is empty, repeat the mixing processes in bucket 1 and 2, again immediately pouring onto the penny floor, until all the necessary resin has been poured.
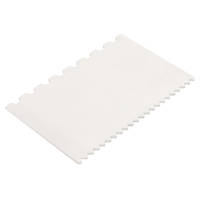
Each subsequent pour of resin will blend seamlessly with the previous pours as the resin begins to self level and spread out on the floor. You can help the process on large areas by using a notched spreader to move the resin around ensuring it reaches the edges of the floor.
At this stage the resin may appear to have a lot of little bubbles within it. However, do not worry, GlassCast® 3's unique formulation includes agents that help expel air during the curing process. Wait around 10 minutes after pouring and spreading the resin and you will see most of the bubbles come to the surface and dissipate.
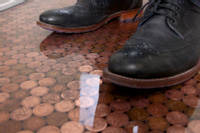
4. Curing the GlassCast® 3 resin
Now the pouring is complete, we must allow the resin to fully cure to give us the hard finish we desire. The resin will achieve an initial cure in approximately 24 hours - temperature dependent. You must not touch or attempt to use the floor during this period and avoid opening doors and windows in that room to reduce the chance of dust and debris falling on the floor.
Once the initial cure has been achieved, the floor will be safe to walk on. The resin can take up to 7 days to achieve full strength so we recommend you minimise traffic for that time where possible.
You will now have a stunning floor that with care will last many years, amazing family and guests alike. Over time you may pick up minor scuffs and scratches but these can be polished out to restore the high gloss finish.
If you are interested in learning more about the product and alternative ideas go the GlassCast® 3 product page.
DISCUSSION (25)
Please share any questions or comments you may have about this video tutorial.
LEAVE A COMMENT OR QUESTION
Downloads (1)
| Penny Floor Handbook |
USED IN THIS PROJECT
Although not necessarily an exhaustive list, the following tools and materials, supplied by Easy Composites, were used in this project.
The quantity shown below is the approximate amount used in the project rounded up to the nearest available kit size or quantity.
DISCUSSION (25)
Please share any questions or comments you may have about this video tutorial.
LEAVE A COMMENT OR QUESTION
100% SECURE
PAYMENT METHODS


Easy Composites Ltd, registered in England 7486797. All content copyright (C) Easy Composites Ltd, 2025. All rights reserved.
