Need any help or advice?![]() +44 (0)1782 454499
+44 (0)1782 454499
USED IN THIS PROJECT
Although not necessarily an exhaustive list, the following tools and materials, supplied by Easy Composites, were used in this project.
The quantity shown below is the approximate amount used in the project rounded up to the nearest available kit size or quantity.
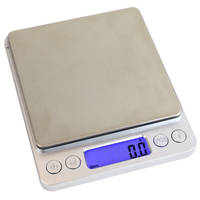
TOOLS & EQUIPMENT


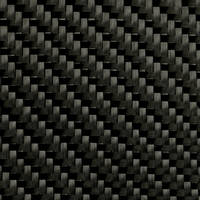
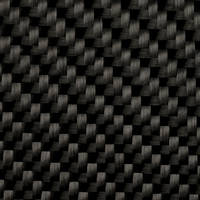
REINFORCEMENTS
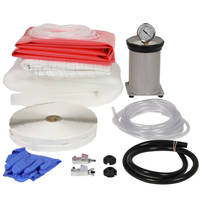
INFUSION EQUIPMENT & CONSUMABLES

VACUUM BAGGING CONSUMABLES
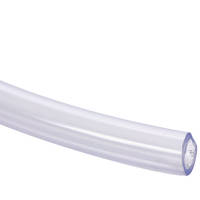
MATERIALS & CONSUMABLES


VIDEO TUTORIAL
Beginner's Guide to Carbon Fibre Resin Infusion
For professional and high quality parts, resin infusion is one of the main methods of constructing these parts. It gives great performance and lightweight parts with a minimal amount of specialist equipment and can be cured at room temperature.
In this guide to resin infusion, the topics covered will include:
- How Infusion Works
- Materials Needed
- Suitable Mould Types
- Layup of the Carbon Fibre
- Infusion Stack
- Running the Infusion
- Demoulding and Finishing
TUTORIAL BREAKDOWN

1. Process Overview
The process of resin infusion can be summarised in that the fibres are placed dry into the mould. A bagging stack is then applied, the mould is then vacuum bagged and a vacuum pulled drawing air out of the bag. The resin is then drawn into the mould by the vacuum and it saturates all the fibres. The part is then allowed to cure at room temperature.
Properly made infused parts will have a perfect resin fibre ratio and will mechanically perform very well, rivalling parts made from pre-preg. They have the advantage of being both cosmetically and mechanically superior than hand laid parts. Also, as the resin is introduced at the end of the process, it is very clean and contained.

2. Equipment & Materials Overview
Using the right materials and equipment is essential to perform the infusion successfully. Once you have a mould made, this is a list of the basic materials and consumables used in the infusion process:
- Fabric Reinforcement - Commonly carbon fibre, but a range of woven materials can be used.
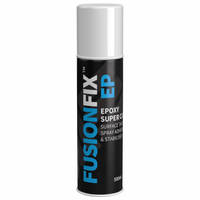
- Spray Adhesive - Except for very flat moulds, used to help position and hold fabric in place.
- Infusion Resin - Low viscosity infusion grade resin helps the flow and wetting out of the fibres.
- PP180 Peel Ply - Allows resin to flow through and is easily removed from the finished part.
- FM100 Infusion Mesh - Creates flow channels for the resin across the fabric surface.
- Resin Infusion Spiral - Creates a fast flowing resin channel for distributing resin.
- Infusion Silicon Connector - Used for both resin inlet and vacuum connections.
- VB160 Vacuum Bagging Film - 50 micron film used to create the bag itself.
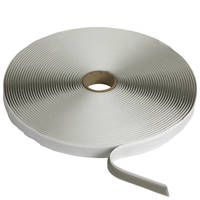
- ST150 Bag Sealing Tape - Used to seal the vacuum bag to the mould flanges.
- PVC Hose - Disposable resin feed and vacuum line hose.
One of the advantages of resin infusion is it does not need much equipment to complete the process successfully. The following items are the common equipment needed:
- Vacuum Pump - Capable of achieving 5mbar (~99.5%) or better level of vacuum.
- Catch Pot - Needed to catch any resin coming from bag to protect the pump.
- Line Clamps - Used to clamp off resin feed and vacuum lines.
- Release Agent - Prevents part sticking to the mould.
- Mixing Buckets & Sticks - For holding and mixing resin.
- Nitrile Gloves - PPE to protect hands.
- Digital Scales - For accurate measuring of resin and hardener.
3. Preparing the Mould
For the process, you will need a suitable mould. Typically the majority of these will be made by taking a mould from the original part or a pattern. A key point worth noting is that for resin infusion, a larger flange is needed to provide space for the bagging process and bagging stack. Typically around 100mm (4") should be enough. Although it is possible to use a smaller flange, it will make the layup more difficult.
The infusion process is conducted at room temperature which means you have a wider range of mould making materials. We generally would recommend the Uni-Mould Tooling System due to its great value and ease of use. You can see a tutorial video for the Uni-Mould System here: Uni-Mould Tooling System User Guide
At this stage the release agent is applied, we recommend a chemical release, such as our CR1, for the superior release performance. The ST150 gum tape is then applied around the flanges while the flanges are clean and free from any stray fibres. The mould is then ready for use.
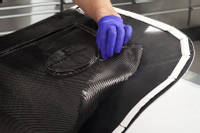
4. Laying the Reinforcement
For this specific part, the 210g twill carbon fabric is used for the surface layer. To back up, one layer of 650g carbon fibre is used as it will have the same thickness of approximately 3 layers of the 210g cloth. The fabrics are then cut out, allowing around 100mm extra to allow for positioning error.
The fibre is then positioned on the mould using a light dusting of the Fusion Fix EP to hold in place. This is done for both layers taking care to ensure the fibres are properly pressed into the corners and detail.
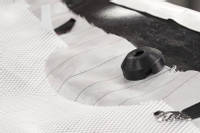
5. Infusion Consumables
From this point forward, the process is now focussed on facilitating the infusion process. This includes making the bagging stack by laying the infusion consumables into the mould.
The first part of the stack is the peel ply. This is then followed up by the infusion mesh which enables the resin to flow over the part. Once the mesh is down, it is important to consider where you want to place the infusion connectors and infusion spiral for best flow of the resin to ensure the part is fully infused. Following the rules in the demonstration and the shown examples, it should be easily possible to plan the best way to ensure the part will wet out with resin fully.
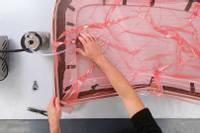
6. Seal and Pull Down Vacuum Bag
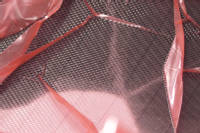
A very high level of vacuum is key to making the infusion process work which means that the vacuum bagging stage is the most critical stage of the lay up. It is essential to get a leak free bag, and you should not start the infusion until the bag is leak tight. We have a specific video covering how to make a sealed vacuum bag which can be watched here: How to Find, Fix and Avoid Leaks in Vacuum Bags
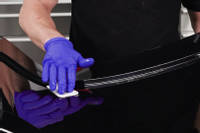
The bagging film is sealed to the mould flange, using pleats as needed to allow sufficient excess to ensure enough film to fill all the detail without bridging. The PVC hose is then inserted into the Infusion Silicone Connectors and sealed in place with gum tape. The hose can be connected to the pump and the vacuum pulled on the bag, adjusting the film as needed. The drop test can then be conducted to ensure the bag is leak free.

7. Calculating Resin Quantity
Now we are ready to mix the resin and perform the infusion itself. To work out the amount of resin needed, first calculate the weight of the layup per square meter. Once this figure is known, it is divided by 1.5 to give the actual amount of resin needed in the laminate. 700g per square meter is added to allow for resin consumption of the peel ply and mesh.
That then gives the resin total per square meter. This figure is then multiplied by the surface area of the mould to give the actual amount needed for the size of the mould. 100g is then added to that total to allow for resin in the hoses and bottom of resin feed pot.
8. Running the Infusion
At this stage the infusion itself is ready to be performed. The correct amount of resin is measured out and thoroughly mixed. The hose is inserted into the mixing bucket and taped in place to prevent movement.
The infusion resin can now be allowed to flow - open the line clamp slowly allowing the resin to flow up to the clamp, then after a few seconds to allow air to clear out the hose, fully open and allow the resin to flow into the part and infuse across the laminate.
Once the resin has fully infused and is moving into the vacuum line hose, the vacuum line can be clamped off fully. The resin feed line is then left open for a short period of time to allow a little more resin in - to help improve cosmetic finish. The resin feed line can then be fully clamped and the mould and part left 24 hours to fully cure.
9. Demould
To check the part is ready for demoulding, bend the resin hose - if ready it should snap cleanly - if not wait longer. The vacuum bag can then be removed. The peel ply and mesh is removed by snipping the edges and pulling off in 100mm wide strips. Then the part can be demoulded with the help of demoulding wedges.
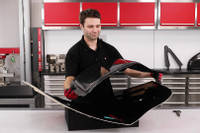
The high quality of the mould has translated into a high quality finished part and with the infusion process completed correctly, has given a flawless pinhole free finish. The part is then trimmed and finished off ready for use. The finished part is less than a quarter of the weight of the original part.
DISCUSSION (14)
Please share any questions or comments you may have about this video tutorial.
Yes, when using the table or formula, the quantity is the combined mix of resin and hardener.
It looks good, just a dark grey colour solid material. You can sand, flat and polish the cut edge no problem.
We don't have a video on it, no. Mainly, it's to do with allowing the pressure to slightly reduce in the bag, this significantly reduces the volume of any residual air. The drawing in of the resin is done by the elastic tension in the bag and mesh. The resin uptake during this phase is minimal (maybe 10-20g on a part like this) but you'll tend to get a better surface finish as an micro-air bubbles will shrink down. Maybe we can look at it in more detail in the future.
Hi Mike, you converted your 914 to electric! Amazing project. For sure a carbon Targo top would go well with that. You're quite right that the attaching/latching hardware and accuracy would be the challenging part. Not impossible but a Targa roof is more complicated than a conventional static body panel. I hope you do it though, and be sure to reach out to our technical team if you need any advice on material or process selection. I wish you all the best with it.
The only time that there's a benefit in making a mould from carbon fibre is when you're using a high temperature process (like prepreg) and you're making carbon fibre parts. The reason for this is because at temperature, the CTE of the material (the mould and then component) really matters. Having a mould that has the same thermal expansion as the component you'll be making in it is advantageous. However, for room temperature processes, there's not really any advantage to a carbon mould. What could be an advantage would be a low-to-no shrinkage resin system. Uni-Mould (like the mould used in this video) is very low shrinkage and an epoxy mould would be even lower shrinkage. So, the shrinkage of the resin makes a lot more difference than the reinforcement, for room temperature processes.
The best solution is a high quality 2k automotive clearcoat. We'll be stocking a product called Fantom Clear very soon, which is one such product, although there are others, both in special 2k cans (the type you have to activate and then use within 48hrs) and spraygun type. Although we do have a clear gelcoat which performs very well in terms of long term UV stability, it's generally not the way we would choose to finish a daily-driven 'carbon look' component because it's harder to repair or restore.
Yes, if you can get the resin flow distances within the rules laid out in the video (or change resin system if you can't) then you should be able to infuse most shapes. It would depend on the dimensions and proportions of this cone-shape but (possibly with some trial and error) it should be possible.
'Galvanic corrosion' is a type of corrosion that occurs when you have two dissimilar materials, with specific properties, in direct contact with each other, in the presence of an electrolyte. In a carbon fibre context, galvanic corrosion is a concern when you have carbon fibre in direct contact with aluminium, in the presence of salt water. It's only an issue when all of these things are present. For carbon fibre vehicle panels, the risk is only really present where you bond carbon fibre panels directly to aluminium brackets or an aluminium subframe, and then use the vehicle in a way that regularly exposes these areas to salty water (like UK winter roads). Fortunately, the solution is fairly straightforward and is a case of making sure that any carbon fibre isn't in direct contact with aluminium, usually by adding a layer or two of glass reinforcement between carbon fibre and aluminium components when bonding or joining them directly together.
The weight saving benefits can be great compared to original OEM parts. On an R8 this is a cosmetic trim panel so replacing both on a track/race car is almost 6kg of saving alone!
Yes, you can post-cure the IN2 resin system. If it's practical to do so then it's generally considered a good idea. Post curing will improve the mechanical performance by a few percent and will raise the Tg (temperature tolerance) of the component. It can also speed up the cure, which can be very useful in high volume production. Please see the technical datasheet for the IN2 resin for suggested post cure cycles.
It depends on the print. Most prints have a high porosity and relatively low compressive strength so may be crushed or have a lot of resin soaking into it. A high infill level on the print may mitigage that. Obviouslty the outside would need sanding smooth and then probably best to lacquer it with a UV stable clear coat.
We have a product called GC50 which is designed specifically for this purpose. It's a an epoxy-compatible polyester gelcoat designed only to be used in this way. Because it's polyester, it's pretty much perfectly UV stable; the epoxy-compatible bit means that it cures hard and smooth on the open face, ready for the epoxy to bond to it (rather than staying tacking like conventional polyester gelcoats do). The advantages to an in-mould coating are obvious (no dreaded orange-peel if your spraying's not up to scratch) but the disadvantages are a slight change to the appearance of the carbon, particularly when doing resin infusion, because the in-mould coating itself will go down with a slight texture and this texture transfers to the carbon fibre, and also if anything goes wrong with the infusion (a dry patch here or there) then you can easily patch it and then spray over it if you don't have an in-mould coating but if you do, it's much harder to recover.
Making such a size and shape as a singe piece moulding would certainly be a challenge, but not impossible. For sure you'd need a split mould, as you describe. Then, assuming the door opening is large enough for you to work inside, I'd probably turn the whole thing over so the door/hatch is underneath; much easier to work this way and you're not standing on the reinforcement as you get in and out.
Then it depends on the process you want to use. Prepreg would be easier to laminate but you'd need to be able to oven cure the whole 8m+ structure, which is probably not practical, and so you'd be left with resin infusion (mechanically better but more complicated to set up) or a conventional wet layup. Assuming you're looking for the best performance then that means infusion. To do this, start by flash-taping the seams on the splits (so they're airtight) and then lay in the reinforcement; you'll need a fair bit of spray adhesive to keep it on upside down in a cylinder. The resin flow will be much more complicated and hard to predict on this shape so you'll need to use microporous membranes (DD Compound MTI hose etc) to maintain airflow and avoid dry spots. Then, the whole thing in a massive bag which would almost certainly need to be an envelope bag (so, you're bagging the inside and outside of the mould, like a giant elongated donut!
If you're serious about the project, get in touch with our technical team and we can give you more detailed advice on products and processes. And, good luck with it!
Thanks for the comment, this is a very interesting question and absolutely deserving of its own video, either a spotlight, or possibly the main channel because it's an important part of a lot of projects. To summarise though, FusionFix EP will leave a residue but it can't be seen and doesn't remove easily. Strong solvents (like acetone) can remove the residue which will leave a very faint 'dither' on the surface. For most parts in most circumstances, we think you wouldn't need to do anything (i.e. just leave it as is) which is a game changer. If you thought the part might be exposed to strong solvents (like acetone) then you would want to remove the residue. But, to be honest, you'd probably need to be thinking in terms a tougher coating for parts that will be exposed to harsh chemicals/solvents anyway.
LEAVE A COMMENT OR QUESTION
USED IN THIS PROJECT
Although not necessarily an exhaustive list, the following tools and materials, supplied by Easy Composites, were used in this project.
The quantity shown below is the approximate amount used in the project rounded up to the nearest available kit size or quantity.
TOOLS & EQUIPMENT
REINFORCEMENTS
INFUSION EQUIPMENT & CONSUMABLES
VACUUM BAGGING CONSUMABLES
MATERIALS & CONSUMABLES
DISCUSSION (14)
Please share any questions or comments you may have about this video tutorial.
Yes, when using the table or formula, the quantity is the combined mix of resin and hardener.
It looks good, just a dark grey colour solid material. You can sand, flat and polish the cut edge no problem.
We don't have a video on it, no. Mainly, it's to do with allowing the pressure to slightly reduce in the bag, this significantly reduces the volume of any residual air. The drawing in of the resin is done by the elastic tension in the bag and mesh. The resin uptake during this phase is minimal (maybe 10-20g on a part like this) but you'll tend to get a better surface finish as an micro-air bubbles will shrink down. Maybe we can look at it in more detail in the future.
Hi Mike, you converted your 914 to electric! Amazing project. For sure a carbon Targo top would go well with that. You're quite right that the attaching/latching hardware and accuracy would be the challenging part. Not impossible but a Targa roof is more complicated than a conventional static body panel. I hope you do it though, and be sure to reach out to our technical team if you need any advice on material or process selection. I wish you all the best with it.
The only time that there's a benefit in making a mould from carbon fibre is when you're using a high temperature process (like prepreg) and you're making carbon fibre parts. The reason for this is because at temperature, the CTE of the material (the mould and then component) really matters. Having a mould that has the same thermal expansion as the component you'll be making in it is advantageous. However, for room temperature processes, there's not really any advantage to a carbon mould. What could be an advantage would be a low-to-no shrinkage resin system. Uni-Mould (like the mould used in this video) is very low shrinkage and an epoxy mould would be even lower shrinkage. So, the shrinkage of the resin makes a lot more difference than the reinforcement, for room temperature processes.
The best solution is a high quality 2k automotive clearcoat. We'll be stocking a product called Fantom Clear very soon, which is one such product, although there are others, both in special 2k cans (the type you have to activate and then use within 48hrs) and spraygun type. Although we do have a clear gelcoat which performs very well in terms of long term UV stability, it's generally not the way we would choose to finish a daily-driven 'carbon look' component because it's harder to repair or restore.
Yes, if you can get the resin flow distances within the rules laid out in the video (or change resin system if you can't) then you should be able to infuse most shapes. It would depend on the dimensions and proportions of this cone-shape but (possibly with some trial and error) it should be possible.
'Galvanic corrosion' is a type of corrosion that occurs when you have two dissimilar materials, with specific properties, in direct contact with each other, in the presence of an electrolyte. In a carbon fibre context, galvanic corrosion is a concern when you have carbon fibre in direct contact with aluminium, in the presence of salt water. It's only an issue when all of these things are present. For carbon fibre vehicle panels, the risk is only really present where you bond carbon fibre panels directly to aluminium brackets or an aluminium subframe, and then use the vehicle in a way that regularly exposes these areas to salty water (like UK winter roads). Fortunately, the solution is fairly straightforward and is a case of making sure that any carbon fibre isn't in direct contact with aluminium, usually by adding a layer or two of glass reinforcement between carbon fibre and aluminium components when bonding or joining them directly together.
The weight saving benefits can be great compared to original OEM parts. On an R8 this is a cosmetic trim panel so replacing both on a track/race car is almost 6kg of saving alone!
Yes, you can post-cure the IN2 resin system. If it's practical to do so then it's generally considered a good idea. Post curing will improve the mechanical performance by a few percent and will raise the Tg (temperature tolerance) of the component. It can also speed up the cure, which can be very useful in high volume production. Please see the technical datasheet for the IN2 resin for suggested post cure cycles.
It depends on the print. Most prints have a high porosity and relatively low compressive strength so may be crushed or have a lot of resin soaking into it. A high infill level on the print may mitigage that. Obviouslty the outside would need sanding smooth and then probably best to lacquer it with a UV stable clear coat.
We have a product called GC50 which is designed specifically for this purpose. It's a an epoxy-compatible polyester gelcoat designed only to be used in this way. Because it's polyester, it's pretty much perfectly UV stable; the epoxy-compatible bit means that it cures hard and smooth on the open face, ready for the epoxy to bond to it (rather than staying tacking like conventional polyester gelcoats do). The advantages to an in-mould coating are obvious (no dreaded orange-peel if your spraying's not up to scratch) but the disadvantages are a slight change to the appearance of the carbon, particularly when doing resin infusion, because the in-mould coating itself will go down with a slight texture and this texture transfers to the carbon fibre, and also if anything goes wrong with the infusion (a dry patch here or there) then you can easily patch it and then spray over it if you don't have an in-mould coating but if you do, it's much harder to recover.
Making such a size and shape as a singe piece moulding would certainly be a challenge, but not impossible. For sure you'd need a split mould, as you describe. Then, assuming the door opening is large enough for you to work inside, I'd probably turn the whole thing over so the door/hatch is underneath; much easier to work this way and you're not standing on the reinforcement as you get in and out.
Then it depends on the process you want to use. Prepreg would be easier to laminate but you'd need to be able to oven cure the whole 8m+ structure, which is probably not practical, and so you'd be left with resin infusion (mechanically better but more complicated to set up) or a conventional wet layup. Assuming you're looking for the best performance then that means infusion. To do this, start by flash-taping the seams on the splits (so they're airtight) and then lay in the reinforcement; you'll need a fair bit of spray adhesive to keep it on upside down in a cylinder. The resin flow will be much more complicated and hard to predict on this shape so you'll need to use microporous membranes (DD Compound MTI hose etc) to maintain airflow and avoid dry spots. Then, the whole thing in a massive bag which would almost certainly need to be an envelope bag (so, you're bagging the inside and outside of the mould, like a giant elongated donut!
If you're serious about the project, get in touch with our technical team and we can give you more detailed advice on products and processes. And, good luck with it!
Thanks for the comment, this is a very interesting question and absolutely deserving of its own video, either a spotlight, or possibly the main channel because it's an important part of a lot of projects. To summarise though, FusionFix EP will leave a residue but it can't be seen and doesn't remove easily. Strong solvents (like acetone) can remove the residue which will leave a very faint 'dither' on the surface. For most parts in most circumstances, we think you wouldn't need to do anything (i.e. just leave it as is) which is a game changer. If you thought the part might be exposed to strong solvents (like acetone) then you would want to remove the residue. But, to be honest, you'd probably need to be thinking in terms a tougher coating for parts that will be exposed to harsh chemicals/solvents anyway.
LEAVE A COMMENT OR QUESTION
100% SECURE
PAYMENT METHODS


Easy Composites Ltd, registered in England 7486797. All content copyright (C) Easy Composites Ltd, 2025. All rights reserved.